

Note: This is the first post in a series of posts which will cover Android App Testing from basics to finally, setting up a Continuous Integration system to automate complete testing of your app on the cloud. These Quickstart posts are made as a starting point with lots of resources linked to helping onboard new and experienced Android app developers, in fifteen to twenty minutes of reading time, to latest practices, concepts and tools.
Contents of Android App Testing series
- Introduction to Android App Testing & Espresso Test Recorder [This post]
- Building & Testing the Room Persistence Library
- Firebase Test Lab, the cloud-based app testing tool by Google [To be published]
- Circle CI & Firebase Test Lab, a quick Continuous Integration setup for Android [To be published]
Why testing?
Imagine you're a new Android app developer in a new team. You've just pulled an existing Android app project the team is working on from version control. You make your changes, run it successfully, then commit it and push it back to the origin master version. There is a final daily build made and run to check for the app's stability. And the app breaks or bugs out. Now, the team will have to sit and go through all the commits by everyone who committed their codes to the master branch. And you are singled out for code review.
You might think what you should've been doing to avoid reviewing this or what the team should be doing to avoid this waste of time and effort, rather than quickly pinpointing what broke the app's required behaviour.
This is what all app developers in the team should be doing:
- Writing tests with any new code, to ensure that any future changes in them can be identified before committing the project.
- Uploading screenshots of any UI changes with the code into the repo, to track UI changes.
- Often testing your app during the development process.
Tests also help you in making sure an app behaves the way it is required or any previous functionality is preserved as the code base grows over time. This will help you in avoiding to wade through large projects to identify what change caused the problem with your older code. This is useful even as a single developer.
Caution: It is not necessary to write tests for every minuscule piece of code or functionality or achieve 100% test coverage. Writing and maintaining tests are time-consuming. One must be pragmatic about testing their code. Major use cases, business logic and classes like data models etc should have tests associated with them, generally. Most importantly, all app use cases or scenarios; good, bad, errored etc, should be recorded and maintained as UI/Instrumentation tests for the app.
Caution: It is not necessary to write tests for every minuscule piece of code or functionality or achieve 100% test coverage. Writing and maintaining tests are time-consuming. One must be pragmatic about testing their code. Major use cases, business logic and classes like data models etc should have tests associated with them, generally. Most importantly, all app use cases or scenarios; good, bad, errored etc, should be recorded and maintained as UI/Instrumentation tests for the app.
Testing on Android
Testing on Android is split into two types of testing owing to the nature of Android Apps which primarily run on mobile devices: Unit Testing and Instrumentation Testing.
Unit Testing comes with Java or Kotlin or any language which supports testing. It is used to test a single functional component of a project. For example, a method or function that adds two numbers should be able to add numbers correctly, reject string parameters or even run within a time constraint to keep it fast enough etc.
Unit Testing comes with Java or Kotlin or any language which supports testing. It is used to test a single functional component of a project. For example, a method or function that adds two numbers should be able to add numbers correctly, reject string parameters or even run within a time constraint to keep it fast enough etc.
Unit tests run really fast on a development environment and do not need any device to run on. It also does not need complete app compilation for being tested. They are mostly used to confirm and keep a check on the business logic of an application. You should use unit tests to confirm your complicated data object constructors and methods work exactly the way you intend them to.
Instrumentation Testing is testing on a device (or instrument) to ensure an app is working as intended on a device. It is used to mimic user experience and covers various use case scenarios of your app. This used to be a very odious, time taking and difficult task on emulators. Such tests can mimic user interactions and test various use cases and scenarios. For example: Entering a correct username and password in your login screen and check if the next activity is loaded successfully or enter incorrect information and check if a proper error message is generated or the app crashes etc.
Instrumentation tests require a complete compilation of your app to start running. The slow response of emulators and devices during testing, especially UI testing, needed very difficult to code thread sleeping and time counting to perform the next step of a complicated set of user interaction. But, with the latest testing tools built for Android, it has become very easy.
Instrumentation Testing Tools on Android
I will cover the latest app testing library provided by Google in this post. There were previously used several testing frameworks and tools like Robolectric, Espresso etc some of which have been now officially collected into a testing suite in the latest Android Jetpack called AndroidX Test.
Espresso Test Recorder
The first easiest tool that developers can start using is the Espresso Test Recorder included with the Android Studio. When you're done building and running an Android Activity with a somewhat working UI, go to Run in your main menu and select Record Espresso Test.
This will start the tool and show a screen like this -
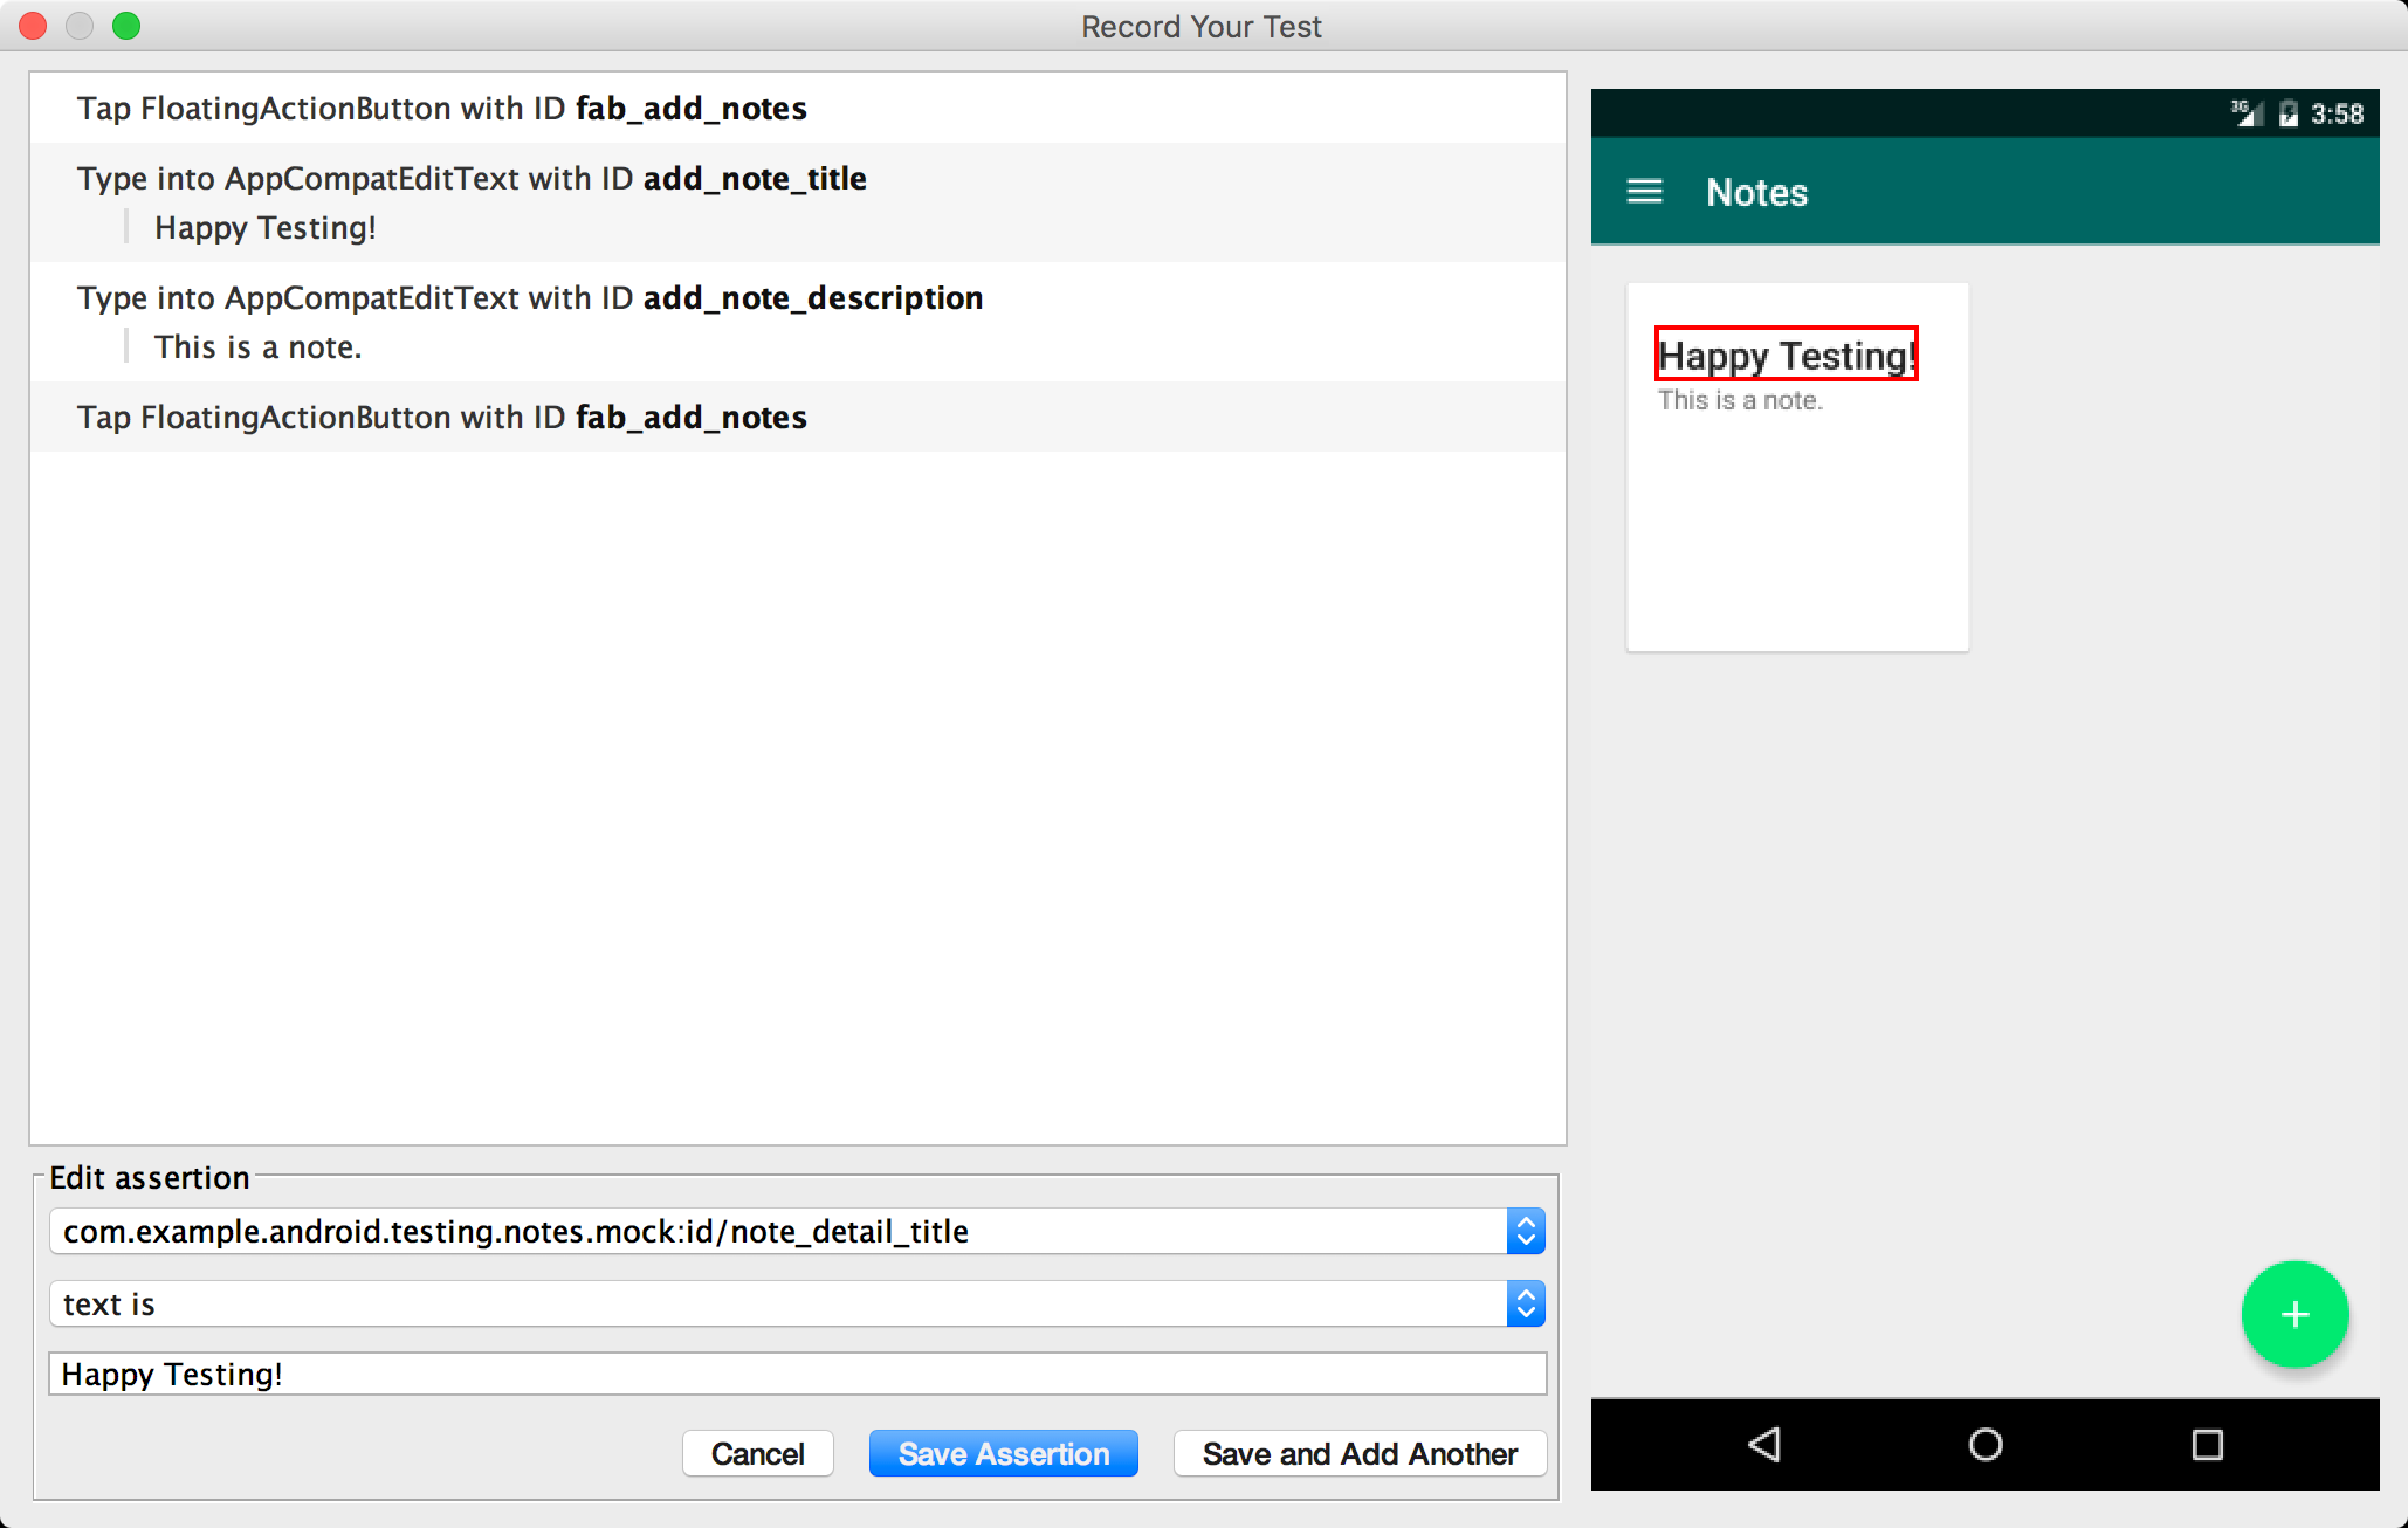
Each user interaction with your app on the screen is recorded as Espresso code in a test file (saved as a .java file). This test file should be saved in androidTest directory of your Android Studio project's app\src directory. Each use case of your app should be covered by an instrumentation test.
More about Espresso Test Recorder can be read here.
Once you've started adding tests to your project, you should always remember to update tests with any changes in user interaction of the app to keep them in sync with changing use cases of your project. It's also helpful to include screenshots of the device with respect to their tests and committing them to your projects repo.
Happy Testing!!
Happy Testing!!


thanks for post!
ReplyDelete